Chillies are the easiest Indian vegetable to grow from seed at home. The catch is that most people lose half their seeds to rot before they even sprout. The reason is almost always the same: home garden soil is too dense, too wet, and full of fungal spores that drown the seed before it gets going.
Coco peat fixes that completely. Our customers who've switched from soil germination to coco peat usually go from a 30% success rate to 80% or higher.
Why This Works
Chilli seeds are small and fragile. They need warmth, even moisture, and air around the root zone. Garden soil holds water in pockets that drown the seed. Coco peat is the opposite. Fluffy, sterile, holds water evenly, and lets air through. The seed sprouts cleanly.
What You Need
- A pack of chilli seeds. Kashmiri red, green chilli, bird's eye, bhut jolokia, all work the same way.
- One Coco Peat Disc for every 4 to 6 seeds.
- A wide bowl or seed tray, about 10 cm deep.
- 500 ml warm water for the disc.
- A spray bottle.
- One 6 to 8 inch pot for each seedling, ready by week 4.
Step 1: Hydrate the Disc
Place the coco peat disc in the bowl. Pour 500 ml of warm water over it. The disc puffs up over 5 minutes. Fluff it with a spoon to break up tight pockets. You'll end up with a generous bowl of dark-brown peat that holds shape when you squeeze a fistful.
Step 2: Sow the Seeds
Press 4 to 6 chilli seeds onto the surface, about 2 cm apart. Cover lightly. Around 5 or 6 mm of peat over each seed is plenty. Don't bury too deep, chillies want a little warmth from above.
Mist the surface gently with the spray bottle. The peat should look damp, not soaked.
Step 3: Place and Wait
Put the bowl somewhere warm and indoors, away from direct sun. The kitchen window or above the fridge are good spots. Chillies want about 25 to 28 degrees to germinate. That's easy from March to October across most of India. Slow going in deep winter.
Mist daily. The peat should always feel like a wrung-out sponge. Never dripping wet, never bone dry.
Germination is uneven. The first sprouts appear at day 8 to 10. Stragglers come up around day 18 to 21. Be patient. Don't panic-water if nothing happens for two weeks.
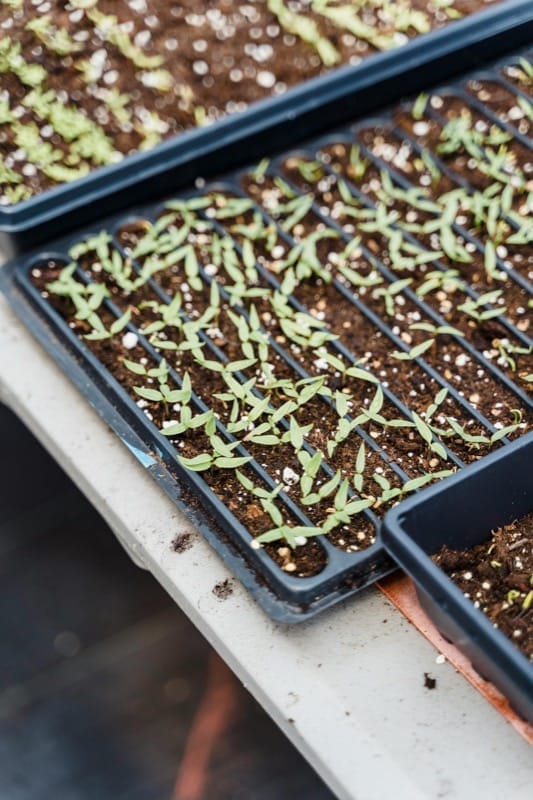
Step 4: First True Leaves (Week 3)
The first set of leaves out of the seed are round and smooth. Those are cotyledons, the seed's own food reserves. The next set, with serrated edges, are the first true leaves. Once you see true leaves, the seedling is ready to move into a real pot.
Step 5: Transplant (Week 4)
Take a 6 to 8 inch pot. Fill it with a half-and-half mix of regular garden soil and the leftover coco peat from your seedling bowl. Don't waste the peat, it's still good growing medium.
Lift each seedling with a spoon, including the surrounding peat ball. Don't grip the stem, it's too fragile. Hold a leaf if you have to.
Make a small hole in the new pot, drop the seedling in, press the soil gently. Water with 100 ml of room-temperature water. Place the pot somewhere it gets morning sun.
Step 6: First Feed (Week 6)
Two weeks after transplant, push one of our Plant Food Sticks into the pot. Water normally. The stick releases nutrients over 45 days.
Once the plant has 6 to 8 leaves, you can also start liquid feeding. Half a cap of Plant Growth Promoter in 1 litre of water, every 15 days.
Step 7: Flowers and Fruit (Week 9 to 14)
Small white flowers appear around week 9. Each flower becomes a chilli. The first chillies are usually the smallest. Pick them green to encourage more flowering. After two or three weeks the plant settles into a steady output.
What Goes Wrong, and How to Fix It
None of the Seeds Germinated
Either the seeds were old (chilli seeds lose viability after 2 or 3 years) or the peat dried out at some point. Try fresh seeds and mist twice a day instead of once.
Seedlings Grew Tall and Fell Over
Not enough light. Move to a window with morning sun. Brush the seedlings gently with your hand once a day. It sounds silly but it stimulates stem thickening, the same way wind would do outdoors.
Yellow Leaves After Transplant
Transplant shock, normal for the first week. Don't feed yet. If yellowing lasts longer than two weeks, the soil is probably staying too wet.
Lots of Flowers but No Chillies
Pollination problem. Indoors, no bees. Tap each flower gently with a finger or a small paint brush every morning for a week. That hand-pollinates them. Outdoors on a balcony, the bees handle it for you.
The same coco peat method works for tomatoes, basil, methi, and microgreens. Honestly, once you've done this once, you stop buying nursery seedlings.
Read Next
Curious which coco peat format to buy? Disc vs block vs loose compares all three. For the seedling stage onwards, push in our fertilizer sticks or apply growth promoter once flowering starts.